Right after the Super Bowl, I came down with a nasty viral infection that’s kept me sidelined from all activities other than work for the past three weeks. Sounds like a real bummer, I know, but there has been a silver lining. I’ve immersed myself in one of my favorite low-energy hobbies: knitting.
My first project was an infinity scarf. I saw a knit one on a woman last month and thought that I could totally make my own. All I needed to do was knit a wide scarf and sew the ends together. That’s simple enough, right? I’m happy to report that it is as easy as I’d hoped. Keep reading to find out how I made mine.

Supplies:
- 1 ball of Homespun Thick and Quick Yarn (I used Violet Stripes)
- Knifty Knitter or Boye Long Loom
- Knitting Tool
- Large-Eyed Needle
- Scissors
Beyond the obvious reason that I’m obsessed with the colors, I chose Lion Brand Homespun Thick and Quick Yarn for this scarf because it is soft and bulky, both of which I think are important for warm accessories that are wrapped around your neck. Sometimes it can be difficult to find a good selection of this yarn, so I’ve also tried using the less bulky version of Homespun Yarn. I definitely recommend that you buy 2 balls if you go that route and knit them as one to achieve the appropriate thickness. As always, make sure that both balls are the same dye lot. Not checking for that is truly a rookie knitter’s mistake!
First, you’ll need to knit the scarf. If you need a refresher course on how to use the Knifty Knitter Long Loom, check out the instruction booklet that comes with it or refer to my Bernat Boa Scarf post. Cast onto 12 pegs, and make sure to leave a lengthy yarn tail. If that’s too wide for you, cast onto 10 pegs instead. I happen to have a long neck! Knit your scarf until you’ve used almost the entire skein of yarn. My scarf was about 66 in. before I sewed the ends together. Make sure that you have enough yarn leftover for the sewing. Cast off. Next, tie the yarn from each end of the scarf together in a square knot. Then thread both through a large-eyed needle, sew both ends of the scarf together, and snip the excess yarn. Voila! You’ll have your very own, handmade, infinity scarf. Mine loops around my neck twice, just like the other infinity scarves in my closet.
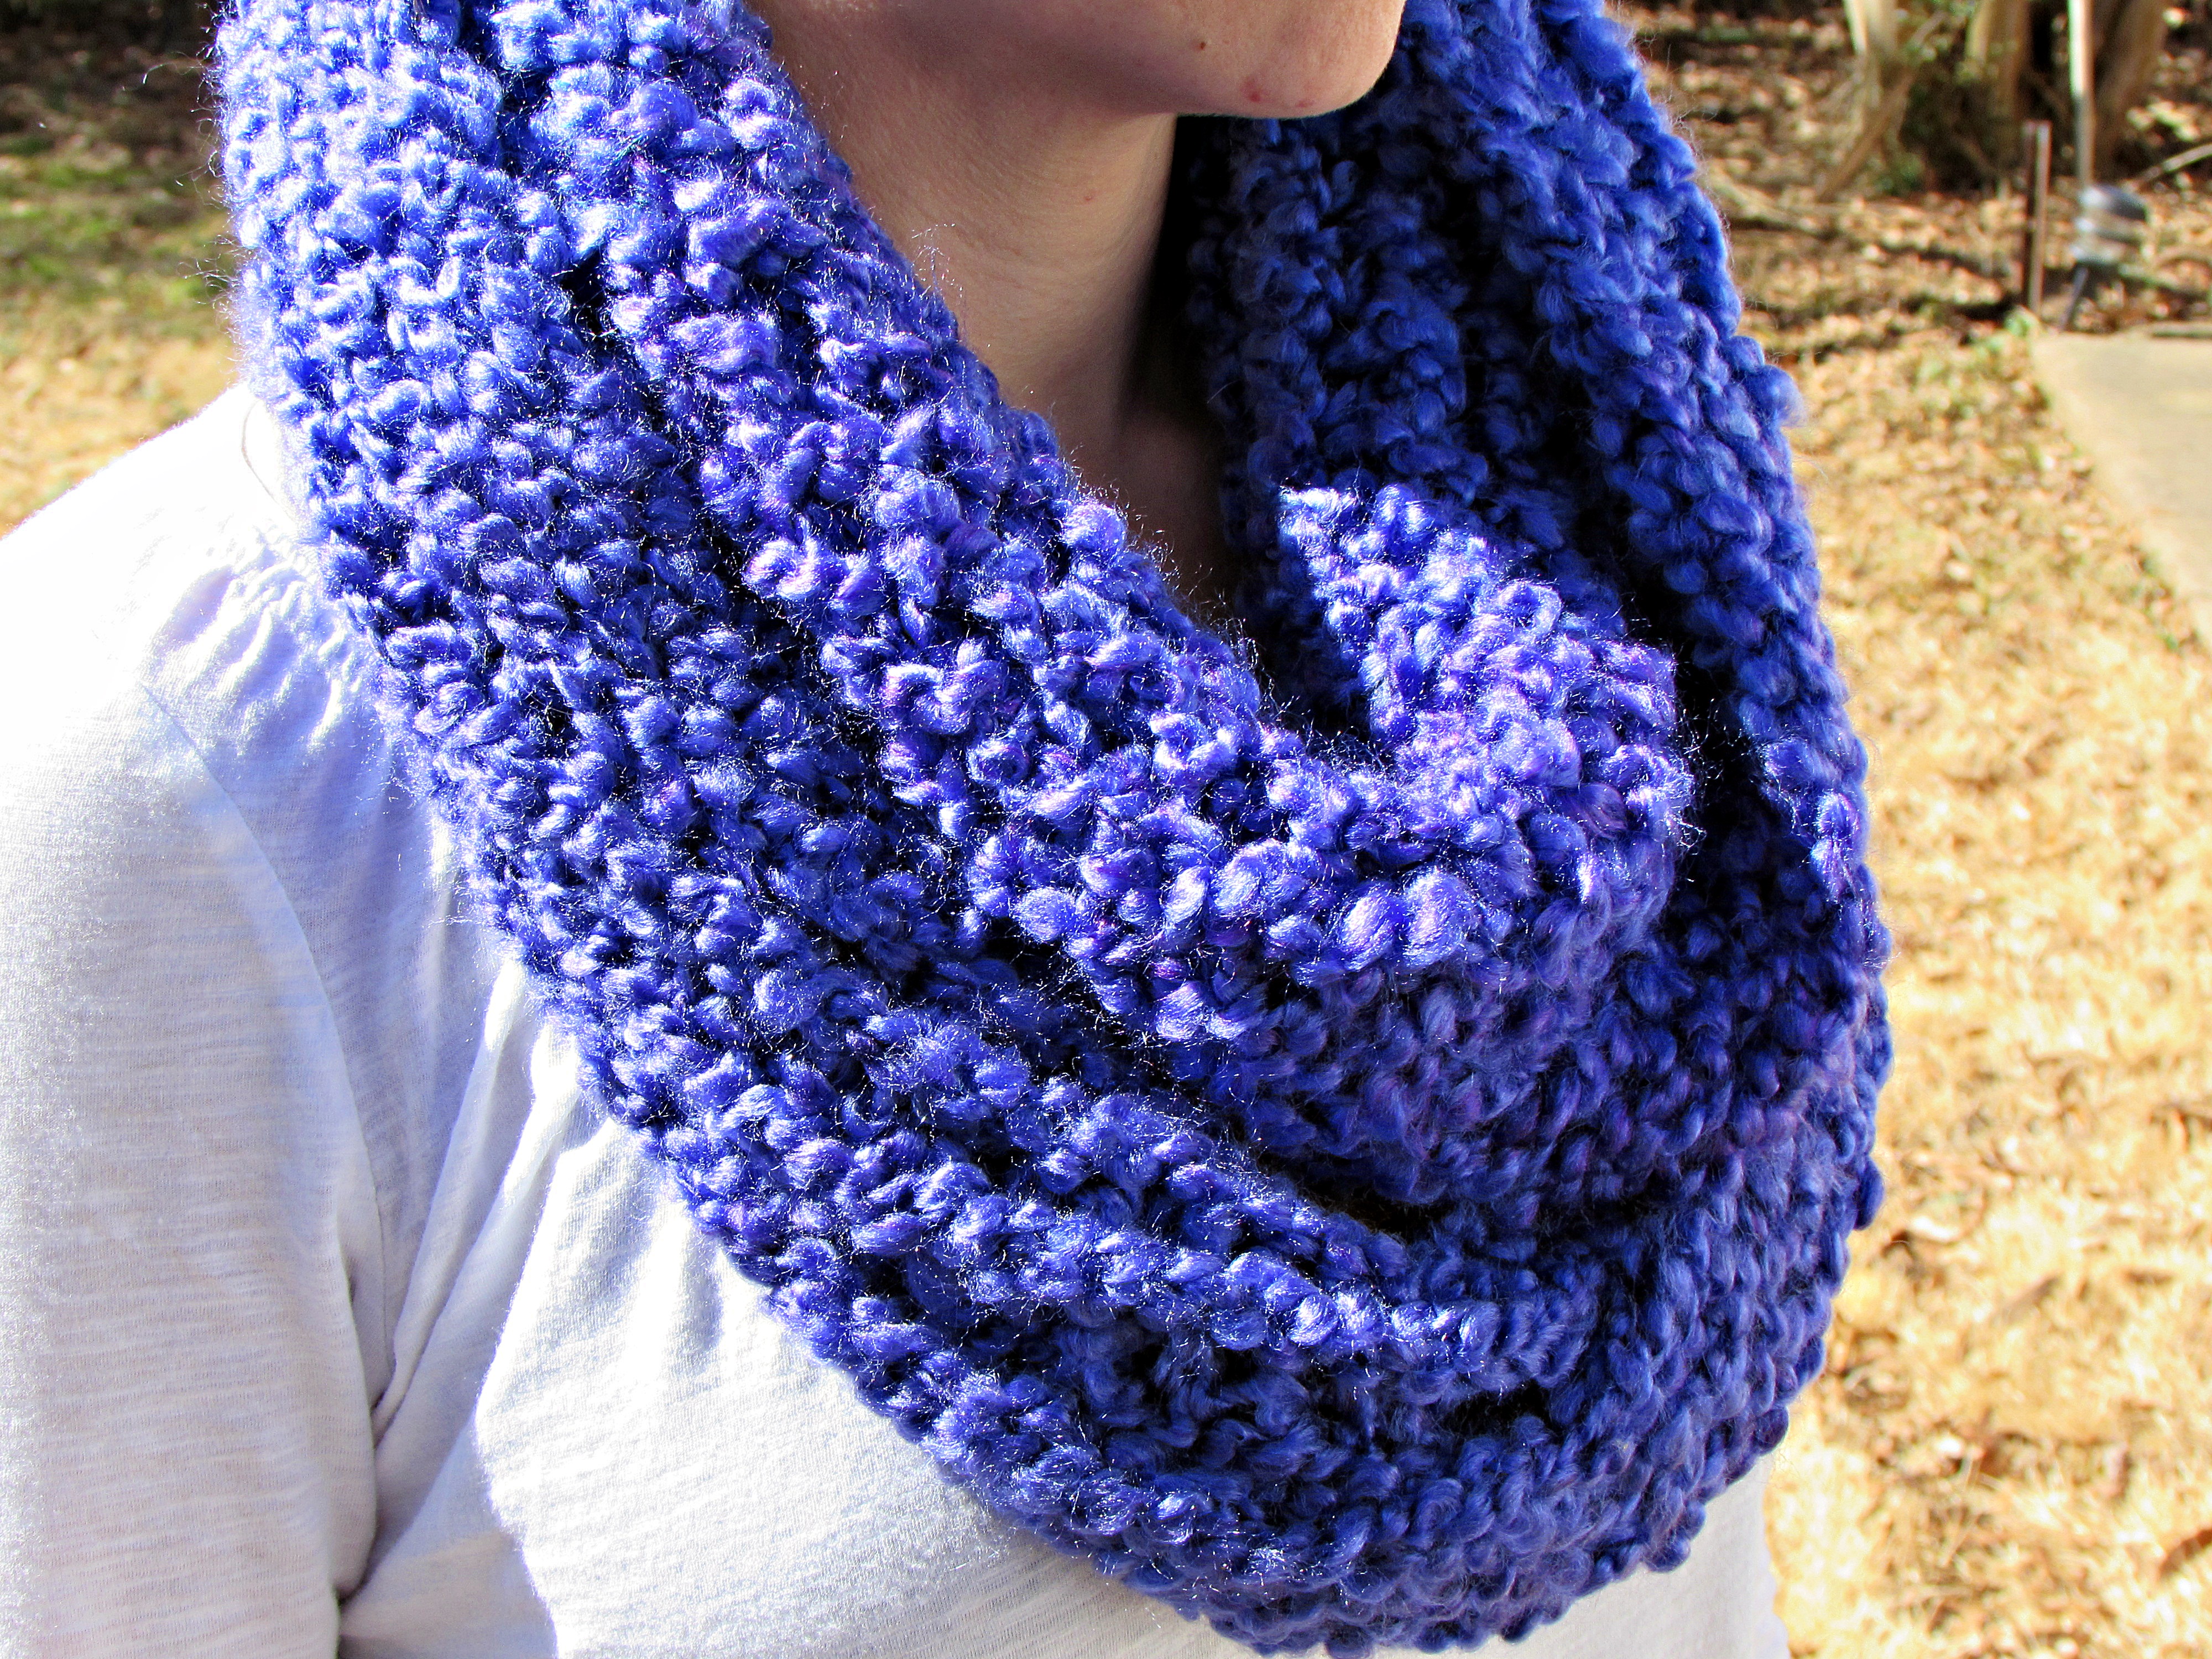
This knitting experiment definitely goes in the win column. I’ve already been asked about the scarf several times, including in the craft store. One of my girlfriends was so complimentary that I’ve made her one, too. Proof that it’s good to be nice to the crafty friend! Happy loom knitting!